
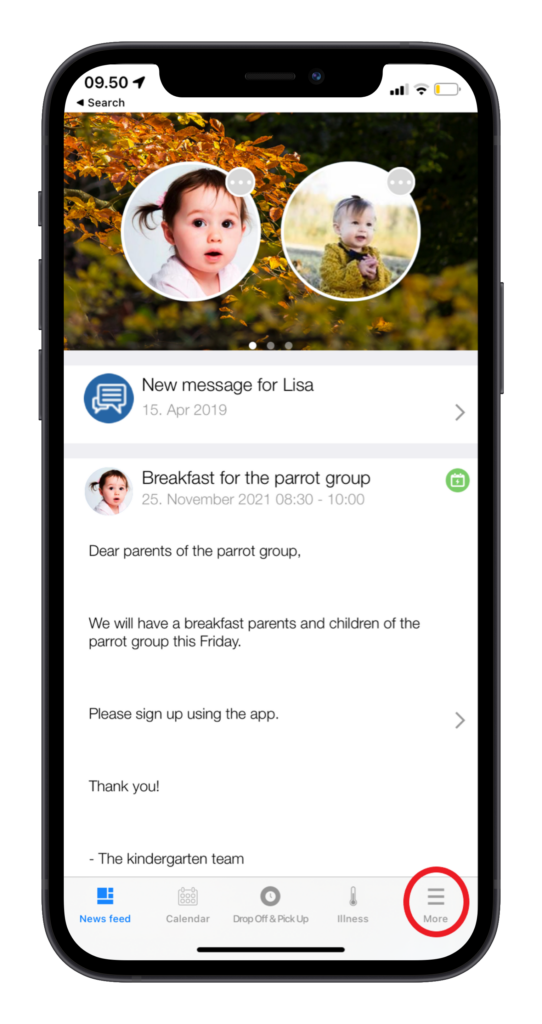
In the news feed you find important information such as invitations, daily activities and pictures. It opens by default when starting the app, and looks like this:
 It can also be accessed by pressing “News feed” in the bottom of the screen.
Choose which child you are viewing the news feed of by swiping the profile pictures in the top of the screen.
Gain an overview of activities related to you child(ren) in the calendar function. Access it by tapping “Calendar” in the bottom of the screen.

Choose to view activities by the day, week or month in the top of the screen.

Choose child or activity type by pressing the filter in the top right.

Gain an overview of contract hours, pick-up person, and pick up times through the Drop off & Pick up function. Access by tapping the clock in the bottom of the screen.
 Access the changing menu by tapping a day. Update information by tapping it, and remember to tap “Save”.
 Create a repeating weekly schedule by pressing “repeating weeks” in the top right.

Update existing schedules by tapping them, or create new ones by tapping “plus” in the top right.
Choose the order of the weeks by tapping “edit” in the top right, and moving the weeks using the three lines to the right.
Report illness by tapping “illness” in the bottom of the screen.

Choose child(ren), symptoms and expected end date of the illness. Add a comment if necessary.

Prolong or end an illness by swiping it to the left

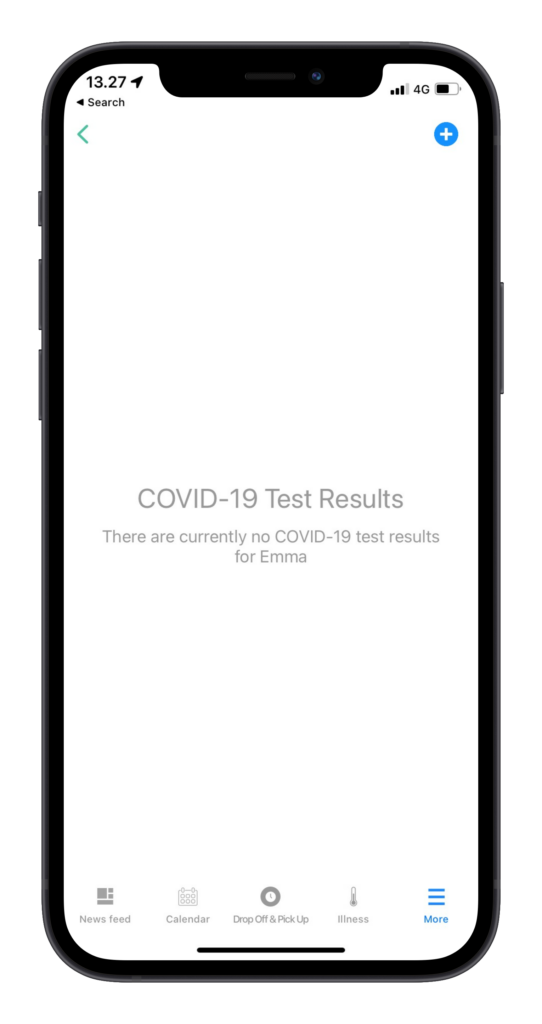
Inform the institution of coronavirus test results through the “COVID-19 test results” function in the “more” tab.
After choosing a child, tap the blue “+” to add a test result.
Fill in the information, and confirm by tapping “done” in the upper right corner. The test result have now been registered, and the daycare will be notified. 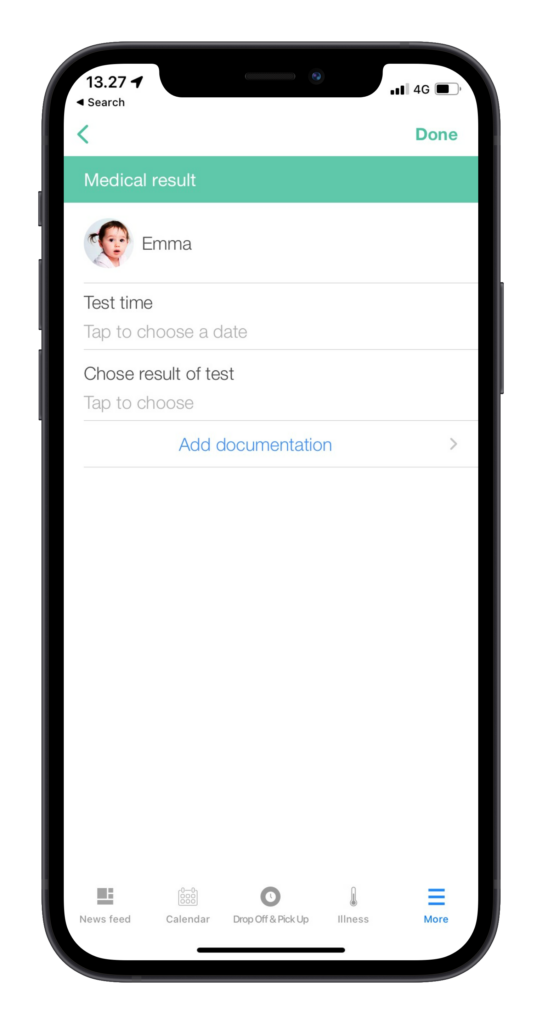
Reach the teachers via the messenger function. It can be accessed by choosing “messaging” in the “more” tab.

Select a child, and you will be able to start a conversation with the teachers of that child.

Send a check-in message by tapping “check-in message” under the “more” tab.
Check-in messages can be viewed by all teachers throughout the day. Therefore, it must not contain personal information.
Choose child(ren), date and write the message. Please remember to press the checkmark in the top right.

Find all old posts my tapping “posts” under the “more” tab. Tab a specific post to view it.
View and download pictures of your child in the “gallery” function under the “more” tab.
View a single picture by tapping it.

Download or share the picture by tapping the share icon in the top right.

Invite other children to playdates using the “playdates” function under the “more” tab.
Create a new playdate by tapping the “+” in the top right. Type the information, and add a comment if necessary.

The parents of the child will receive the invite through their newsfeed.
View the contact information shared with you in the “shared contacts” function under the “more” tab.
You can share your own contact information by tapping the share icon in the top right.

Inform the institution of planned absence under the “vacation” function in the “more” tab.
Choose child(ren), time period and add a comment if necessary.

Please remember to save by tapping the blue checkmark.
Inform the institution whether your child(ren) will be attending daycare during the holiday periods in the “holiday periods” function under the “more” tab.
Choose whether your child is attending or not by tapping the “vacation / coming” slider. 
The word marked with white is selected. In the example above, the child is attending daycare in the period.
Give permissions for certain activites requested by the daycare through the “permissions” function under the “more” tab.
Give permission by tapping the slider so it turns green. Please remember to save by tapping the blue checkmark.

Find the standard permission form using the “index card” function under the “more” tab. This is very important to fill out.
Give permission by tapping the slider so it turns green. Please remember to save by tapping the blue checkmark.

Automize payments using the “SEPA authorization” function under the “More” tab.
Update your SEPA data and confirm by tapping the blue checkmark in the upper right corner.

Gain an overview of your vouchers and subsidies through the “voucher” function under the “more” tab.
Choose a child, and add a voucher by tapping the “+” in the upper right hand corner.
 Fill in the information, and remember to save by tapping “done” in the upper right corner.
View and sign contracts through the “contracts” function under the “more” tab.
View a contract by tapping it, and choose “review contract”

Tapping “agree” allows you to sign the contract, or upload a picture of the signed document. Please remember to save by tapping “Accept” in the upper right corner.

Add a vaccination document using the “vaccinations” function under the “more” tab.
Choose a child, and proceed to press the blue “+” icon in the upper right corner to add a vaccine.
 Add the information, and please remember to save by pressing “done”.
Update or add contact information by using the “my contact info” function under the “settings” tab. Access it by tapping the more tab:
Then access setting by tapping the cogwheel

Then access my contact info by tapping it

Update or add contact information. You can share this with other parents throught “shared contacts”

Update or add profile pictures through the “profile pictures” function under the “more” tab.
Access settings by tapping the cogwheel
Access the profile pictures tab by tapping it

Add or update profile pictures by tapping them
